While I love (and will keep open) my Etsy store, it is limited in a lot of ways. I decided to take the plunge and convert my blog site, RequiemArt.com, to a Shopify store. Shopify is every bit as secure as Etsy, and takes even more forms of payment, so yay.
The shopify interface also lets me keep my blog and free tutorials/resources, so now you can click back and forth between size charts and patterns without having to go back and forth between my site and Etsy. Double yay!
It’s also way more customizable, so now you can do things like sort sizes by sub category–ONLY want to see the patterns that fit Curvy Barbies? Do it with 1 click!
And finally, as an independent, I don’t qualify for most of the VAT/Consumption/Sales taxes that a big distributor like Etsy does. This might not be a big deal if you don’t currently pay tax, but if you’re in the top tax bracket (27%) it’s HUGE!
PS- And if you try out the shop in the first week (Sunday Oct 28th, 2018), your first pattern is on the house 😉 Use code “FIRSTONEONME“
On the list of things that probably no one ever told you you should do, and some people mention that you should do it but no one ever goes into HOW:
When you’re doing a rolled hem on a corner, you end up with a part where the corners overlap. This join is chunky and has a lot of fabric that it doesn’t need.
When you miter the corner, you remove all of that fabric, make sure the raw edges get hidden, and force the corner to be pretty and sit flat. It makes the two hem allowances meet at a pretty-looking point, instead of overlapping.
There’s a lot of different ways to miter a corner and any way that removes the bulk and hide the raw edges is the correct way. It was a lot of years of sewing before anyone even mentioned to me that a sewn miter like this was possible, so this has always felt like one of those great sewing secrets.
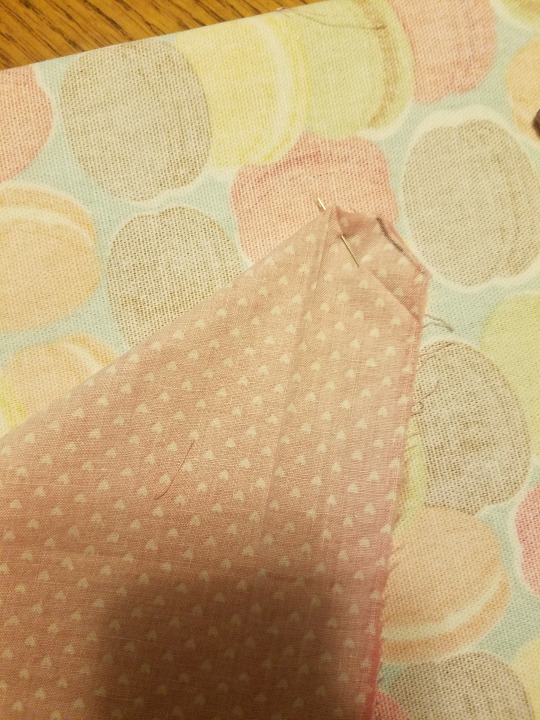
So, start by making your hems and pressing them into place. This technique relies on you using lines pressed into your fabric. At the corner where your hems meet, just roll one hem on top of the other one, and press through both.
Now you a little set of four squares pressed into your fabric. If your corner isn’t a square corner, it’ll be a little set of diamonds, but you’ll still have that little shape.
The bulk in your corner comes from all these little shapes having to exist on top of each other, when you don’t really need all of them for your hem.
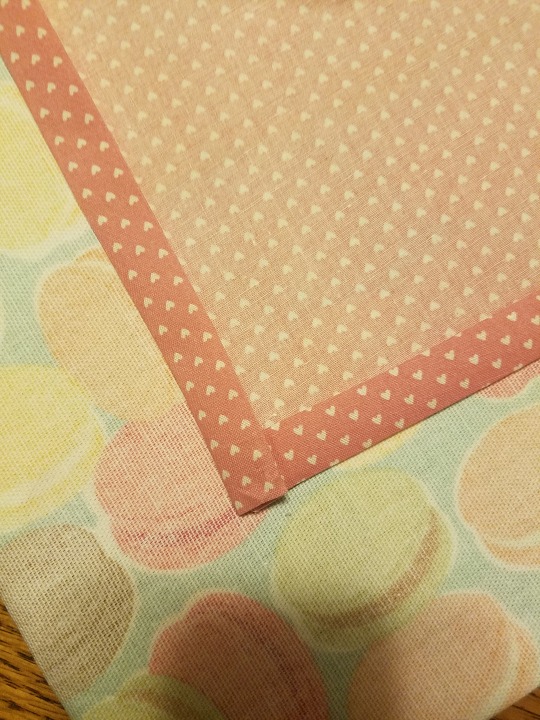
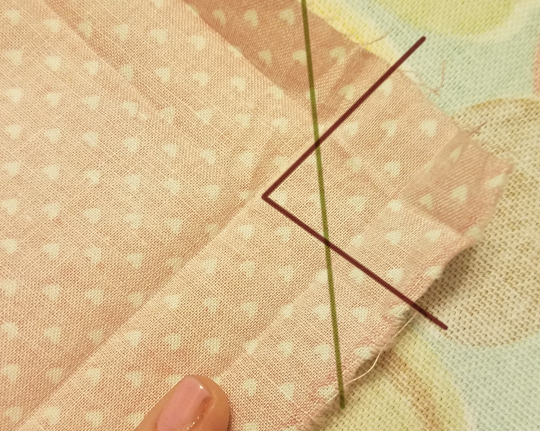
You’re going to use the corners of the inner square to indicate where you cut off your corner. Don’t mark it here like I did. Just slice it off. (My marking is visible in the final corner, which is why you don’t want to have an unnecessary mark here)
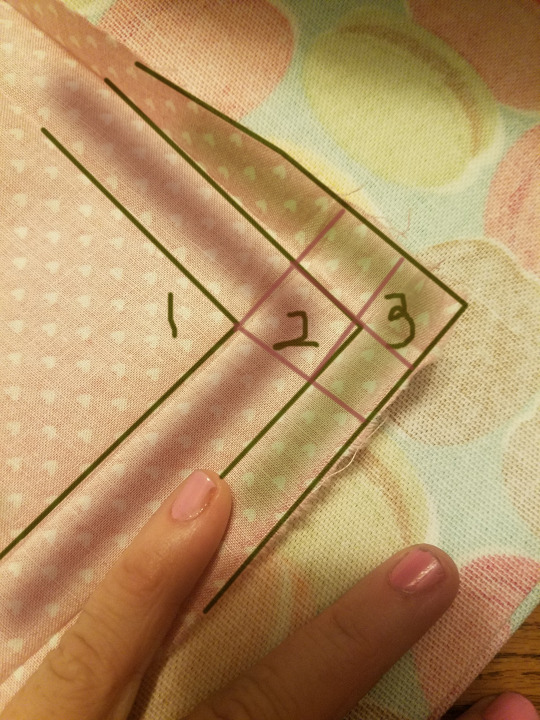
Here’s a quick visual of what we’re looking at before you cut off your corner. There’s a little series of four squares in the corner. There’s three layers of your fold, which I’ve numbered. Corner number 1 is the final edge. You do not want to make any cuts on the inside of corner number 1, because you’ll be cutting the face fabric that your finished item is made of. Corner number 2 is the edge of the visible hem. You don’t want to cut much into corner number 2 because it’ll be visible when you look at the reverse of your hem, and because you don’t want raw edges on your hem. Corner number 3 is the part that is turned under. It’s what’s inside the hem. As long as there’s enough fabric to hold down that folded edge, you can cut here all you want.
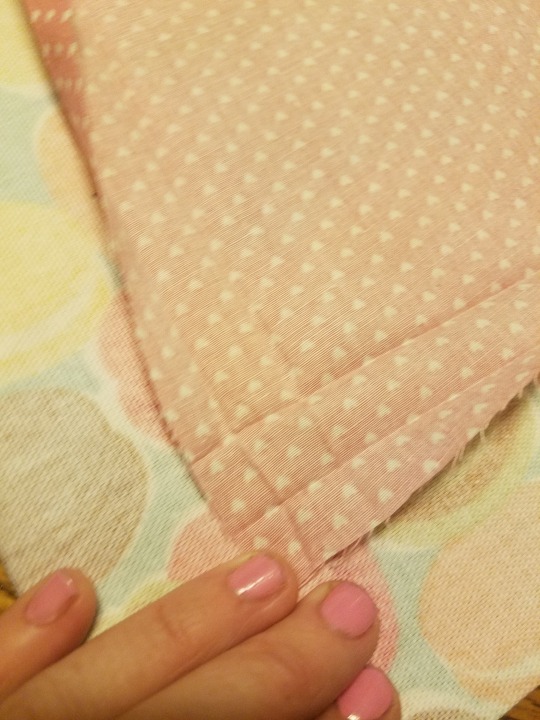
When you make your cut across the inner square, you will be cutting off all three of the little squares in corner number 3, and half of the square in corner number 2 (as well as some extra cuttof in corner number 3 outside of the squares). See that big corner you lopped off? That used to have to curl up in the edge of your hem! So much better, right?
If that talk about corners got confusing, don’t worry. Just cut your corner off like the top picture shows. The explanation is for people who like sewing theory or who want to know exactly when and why they remove the fabric. Everyone learns in a different way.
In addition, I like to cut the remainder of the square out (darker line). A lot of people don’t like doing this, because it leaves you with less seam, but I like the results it makes.
Here’s another theory bit. What we’re going to do is fold the hem backwards and fold the edges to make a perfectly straight line that comes from the corner of the fabric.
The excess hem allowance will fold and go to either side, giving you enough room to make a seam.
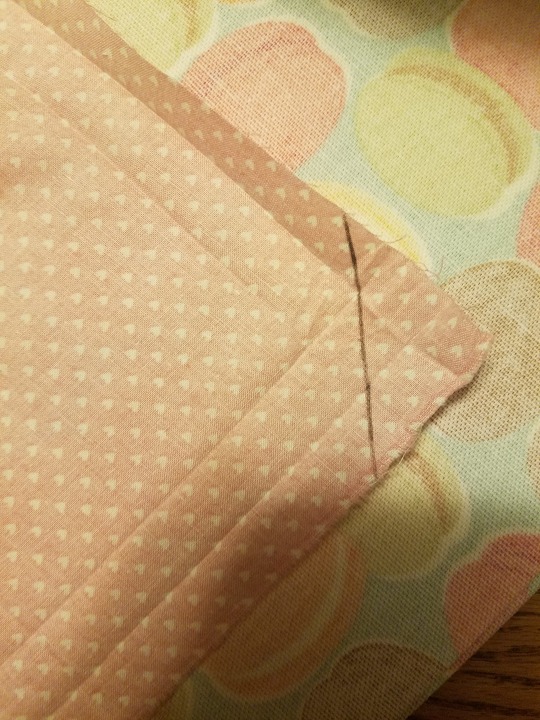
You will then sew that corner, leaving your turned-under edge free so you can turn it under (pencil line)
But the easiest way to actually DO that is to fold your garment in half on the diagonal. Then you can easily fit it under your sewing machine.
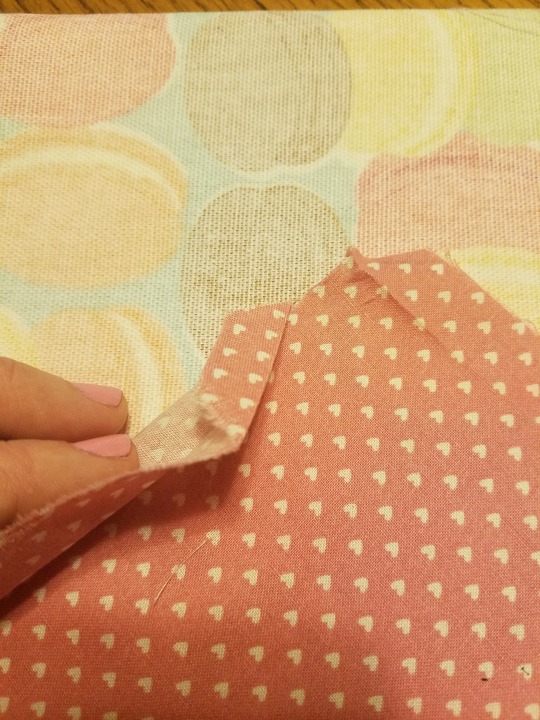
(You can see that my initial mark is still visible in this picture. This is why you don’t need to mark it)
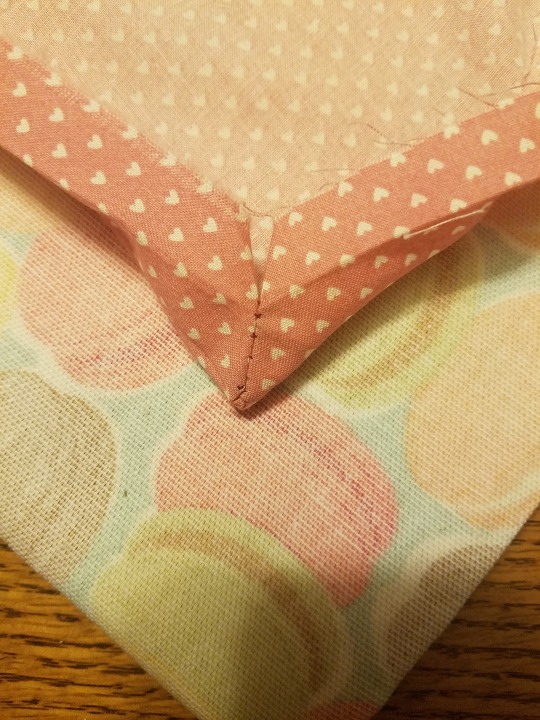
Sew that corner with a small-length stitch, especially as you go towards the corner of the fabric. I sewed mine by hand, since I was just doing a demo and didn’t want to pull out a sewing machine. You can see where the large stitch in my final corner prevented me from making a sharp turn.
Make sure you leave your turn-under (corner #3) pieces free. Don’t sew them into the corner or you won’t be able to turn your turn-under under.
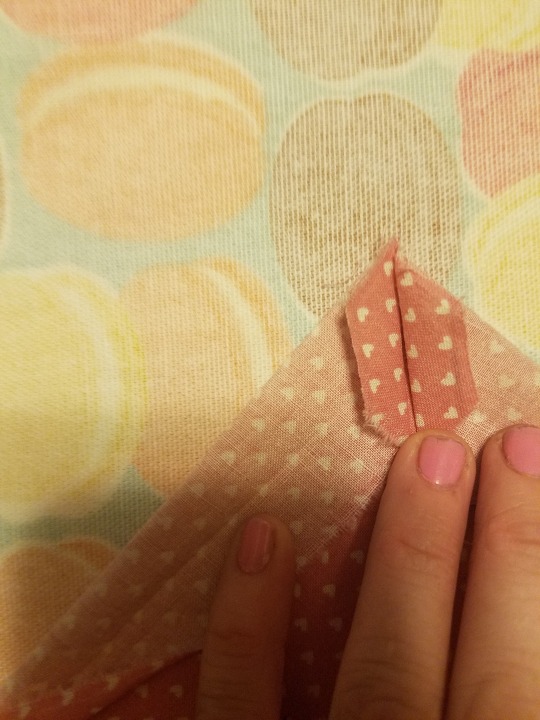
Now flip that corner back to the wrong side of the fabric. Use the point of your scissors or a sturdy pin to make sure your seam allowances are lying flat and smooth. Press this thing a few times, and then fold your turn-under under and press that in place, too.
Now your corner is ready to be sewn down with whatever hem finish technique you’re planning on using. Bulk-free, pretty, and it ain’t migrating anywhere.
NOTE: If this is too much of a pain, at least cut off your corner like we did at the beginning. You don’t need any of that bulk in your hem, and cutting that piece off takes no time.
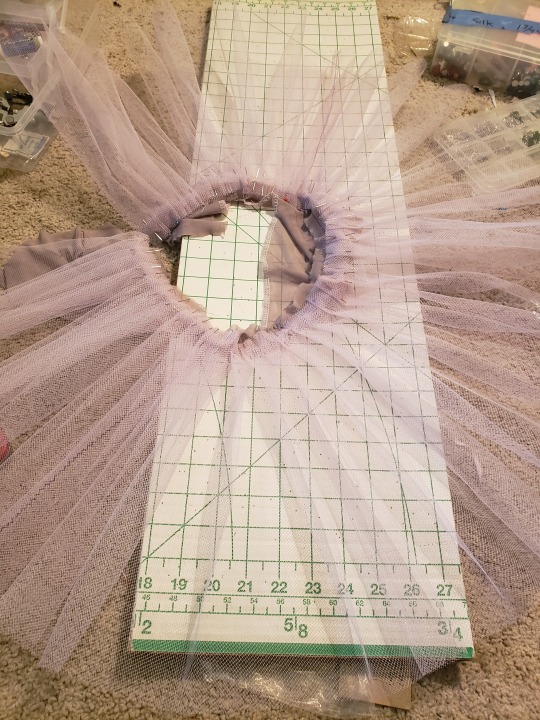
It’s October, and you know what that means: time to get serious about all our Nutcracker prep. Hashtag Costume Designer Life. Here’s a ballet tutu technique that you can cross-apply to making petticoats. This isn’t as much a lolita tutorial as a technique that I’d like to experiment with lolita sometime, that I think has some good potential, but that is going to take a bit of work before it becomes something we’ll use every day.
Someday I’ll actually write a book on Petticoat Theory, but here’s a little bit more for today: when you make a petticoat out of a harder material (like stiff net or crinoline), you need less fabric to get your initial poof shape. However, if your harder fabric becomes softer with age, it will lose that initial poof and become smaller. After a longer period of time, if your fabric becomes soft, your petticoat will be the size that it would have been from the start if you’d made it with a soft fabric.
This does mean, however, that we have the secret to the never-deflating petticoat: