Some designs have mountains of ruffles or such flowy ruffles. Sometimes just gathering your skirt won’t do the job. Like for eternal moon or Sakizou’s Honey, sometimes your ruffles need a little help!
Materials:
-Fabric, yardage depends on the project.
-Matching thread.
-Horse hair braid (measure your skirt hem for yardage)
-Patients! This is a long process!
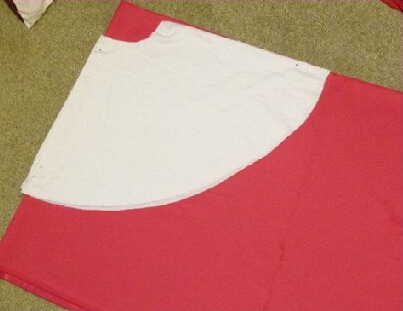
Step 1: You will want to fold your fabric down the middle and than once more creating a right angle. Use your circle skirt pattern and cut out two different circle skirts.
NOTE: You can do as many circle skirts as you need, for senshi skirts I do 2 circle skirts.
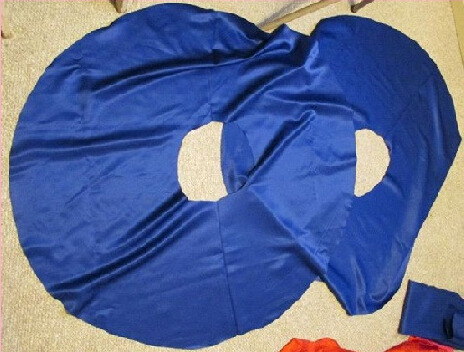
Step 2: Now you should have to identical circle skirts! You will want to check them to make sure they match up and not that one isn’t much longer than the other!
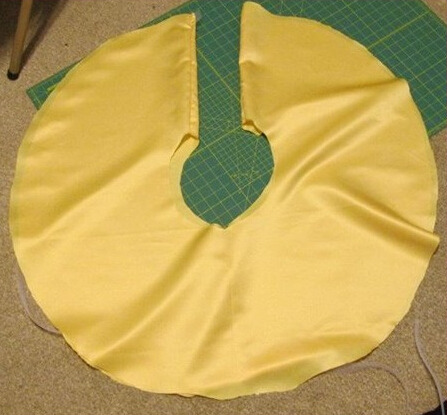
Step 3: You will cut a slit up the side of each one of the skirts. Next you will sew them together to make one monster skirt. You can do a normal seam or a French seam depending on what project your using it on.
Step 4: Now you will want to let your skirt(s) sit over night to let the hem drop/relax. Sometimes with some fabrics they can stretch a little so this will give your hem its chance to change and now mess you up later.
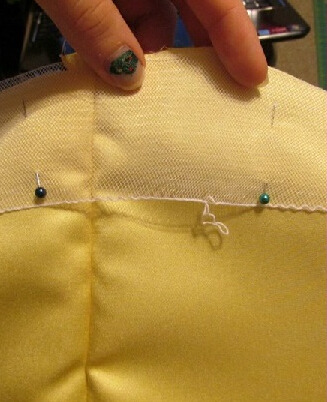
Step 5: Now pin the horse hair braid to the right side of your skirt. Wider ones have a string you will pull to create a curved edge. Less wide versions will curve without the string.
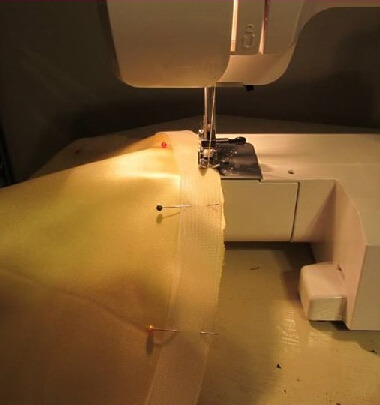
Step 6: Now you will sew the horse hair braid to the skirt. Stitch it to the side that will face out in the end. Make sure to gently hold it, if you pull the braid will change shape as you stitch. NOTE: Stitch at a ¼th, you want to only have a little between the stitch and the edge because you will be flipping it.
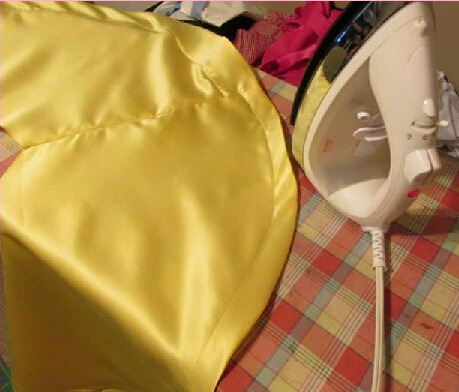
Step 7: Now for ironing round 1! You will flip the horsehair and them hem to the wrong side of the fabric, you will iron the hem down. This will keep it flat when you stitch the top half down.
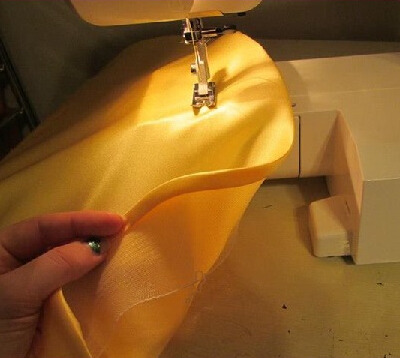
Step 8: Go and stitch down the top part of the horse hair braid down, you will want to pin it down before stitching. Take your time so you don’t miss the top when stitching, stitching it this way will keep it from pulling and bubbling weirdly.
Step 9: Now you will want to go iron it down again. If your fabric is thin you may want to put down a cloth between it and your iron so to keep the braid from creating a weird pattern on your hem.
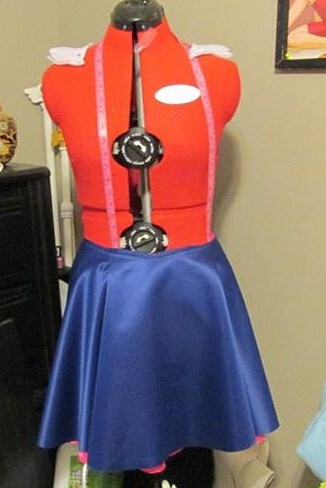
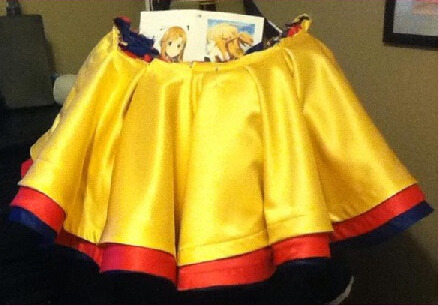
Step 10: Pleat or gather your skirts together! In my case I pleated my skirt, this is how it turned out, the horse hair braid helps it ruffle out a lot!
not the most exciting of updates – I hemmed a skirt, woohoo – but I thought I’d share one of my favorite techniques with those of you who aren’t familiar.
circle skirt hems were something that baffled me when I was more of a paste eating baby noob than I am now – I used to always hand-stitch them which is all kinds of not fun. horsehair braid (not actually made of horsehair) is a great option because it acts like bias tape (since it’s stretchy it curves with the hem and lays flat) and adds shape and volume to the skirt. Rufflebutt has a great tutorial on creating a horsehair braid hem, so I’ll let her do the talking for me in that aspect.
Pictured here is 1 inch horsehair, which is my preferred size. I used it on my Sheryl last year; keep in mind the skirt is also enormous – the hem was ten yards! – but it produces a great poofy effect without using a petticoat. here, I actually used ½ inch horsehair, which I don’t like all that much but a) I wasn’t looking for extreme shape or volume in this case b) I will be wearing a petticoat with the final costume and c) I had just enough of it lying around and figured I’d use it up instead of going to buy bias tape. (speaking of, bias tape is also a great way to finish hems on circle skirts and pleated skirts – here’s another handy tutorial.)
so, here you can see that it gives you a really nice clean hem, which can be hard to achieve with circle skirts – they often end up wrinkly, which looks even worse when you are using satin like I am, but that’s not an issue here! I have a picture of it without the petticoat to show how it affects the shape of the hem – keep in mind that the shape is also affected by how big your skirt is and the width of the horsehair (I’m using 4 inch horsehair for another project, so there are several sizes to suit whatever effect you’re going for).
anyway I hope that was useful to somebody because horsehair is pretty great!!!
So in this post, I listed some of my favorite tips and tricks. Since writing, I’ve gotten some questions that I’ll try to address here.
1. What is horsehair braid/how do I use it?
Horsehair is a plastic net-like hemming ‘trim’ found in the notions. It’s used on curving hems like circle skirts usually, but I find that it makes hemming just about anything easier. Especially knits, which can be difficult to get a nice clean hem out of. I learned how to use it with this tutorial. It’s a little time consuming, but worth the time and thread.
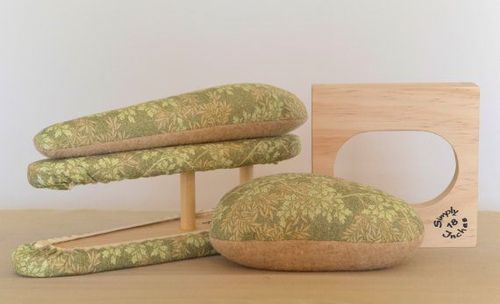
2. You said use a pressing ham, but didn’t say what one is.
They’re round-ish pads used to iron curving seams. For those of you making princess-seamed dresses, the fat one down there is your best friend. The long thin one is to iron sleeves without putting a crease in them.
3. A costume journal! What a great idea!
I just use an old composition journal I grabbed at wal mart on clearance a few years back, but there is a company that makes one called 110 Creations: A Sewist’s Notebookthat looks really useful and organized, and I’m considering getting one for myself.
4. Wait- so I can make my own bias binding? What is this witchcraft?
Yes, you can. This tutorial is pretty simple from the looks of it, although I’m sure you can find one to suit your needs or style. It’s pretty easy, especially if you have a tape folder. They come in several sizes and are found in the quilters notion section in most fabric and craft stores. Here’s what you’ll be looking for:
5. Um…flatlining?
Yes. Basically you just layer another fabric beneath your fashion fabric and then sew it all together.. Here you can find an explanation and instructions. Seems a little intimidating, but easy, I promise.
I hope I answered everyone’s questions! If you have any more, please feel free to ask!
Horsehair is a really interesting hybrid of interfacing and crinoline. Despite its name, it is actually made of nylon. It looks like this, but it comes in a whole variety of widths and colours.
The cool thing about horsehair is that it’s flexible but still stiff enough to give body. When you compress it or stretch it, the weave of the horsehair bends with you but still maintains a sturdy structure. It likes to stand out in big circles and loops, which means when it is sewn to a fabric, it makes the fabric flare out beautifully.
This post of mine showing my draft of Mami’s skirt shows what it does well, I think. Without horsehair, the skirt falls in little ripples because there’s nothing guiding the bottom hem. But this is the exact same skirt with horsehair pinned to the edge — that’s the dark netting stripe. The horsehair doesn’t want to fall in little ripples, it likes big circles, so it forces the hem of the skirt to fall in bigger ripples. It’s flexible, so it still moves and sways and sashays like a skirt, but it gives the skirt a whole different form! It makes it puff out instead of falling limp.
It’s a very neat notion. I’m considering trying it in a cape sometime, to see if it’ll make the bottom hem flare out even more!