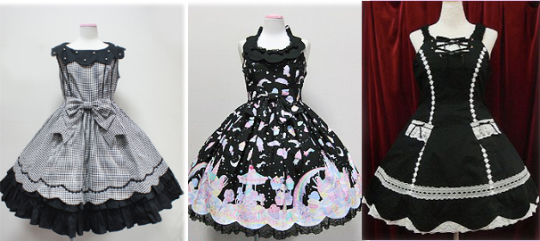
They’re a fabulous way to avoid using lace on your dresses. They’re also a nice option if you don’t have enough fabric to do a rolled hem. They’re especially useful if you’re sewing on calico.
From now on, “quilting calico”
is what I’m going to call the non-premium quilting cotton collections
(lowest price, but best selection of lolitable prints). This is because I
don’t like using “cotton” to describe a kind of fabric,
when cotton is a very versatile fiber that makes many different kinds
of fabrics. “Calico” is technically a kind of fabric that
refers to a low thread count, minimally processed fabric, but it’s
the closest I could get without delving into a 30 word description.
Many people who make statements
beginning with “handmade lolita only works if–” talk about
the way that calico behaves as a garment fabric. It’s often said to
drape poorly, which means that it’s stiff and doesn’t mold to a form
very well. It makes larger, sharper creases when made into a shirt of
bodice and worn by a human.
Handily, there’s a lot of ways around
this.
One of the ways to get a calico to
drape better on a skirt is to make sure some weight ends up at the
hem. This can be done with lace, which also stiffens the hem somewhat
and forces the fabric to behave like a more expensive fabric. Another
way to get some more weight at the hem is to use a faced hem.
Faced hems are cool because they allow
you to smoothly hem any shape
of hem. For a scalloped hem, like my dress, facings are the only way to
get a nice hem. They aren’t necessary on every kind of hem, but
they’re a great tool to have in your skillset. This is especially true
on flared hems, where turning up for a hem can lead to puckers on the
inside. Faced hems are also great in any case where your skirt might
be visible on the inside, because they look very neat. (Showing off your skirt inside doesn’t happen in lolita a lot, but if you get into theatre or cosplay or
dance and have an onstage costume change or a very dynamic
choreography with swishy skirts, they’re a good thing to consider)
You
might also want to add a faced hem onto any lightweight, opaque
fabric that you would like a little more weight on the edge of. The
phrase “added weight” doesn’t sound like it’d jive with
petticoats, but a little more weight on the hem can keep a dress’
silhouette in “lolita” territory, when too little hem
weight can make the bottom edge flare out and send it into “square
dance” or “rockabilly.”
Making
lolita out of calico is basically the art of making calico behave
like a more expensive fabirc. In many cases, that’s very easy. It’s
mostly a matter of adding more fabric, more thickness, or more weight. Faced hems are
one of the more involved ways of pulling that off, but they’re not
difficult, they’re extremely useful, and look very professional.
Step
zero of all calico projects is to prewash (they shrink, sometimes big
time) with a good soap and a liquid fabric softener. If you’re
confident in the print’s ability to not run, hot water’s a very good
idea. When your fabric shrinks, it closes up the holes in the weave a
little bit, which makes the fabric tighter-woven. A lot of fabrics
meant for quilting have a sizing put in them to make them stiff. This
is good for quilting, but for garments, we want it OUT. Liquid fabric
softener can make a huge difference, and I don’t consider it
optional. Liquid fabric softener actually penetrates the fabric and
disperses through it, which dryer sheets and dryer balls don’t do.
You can use fabric softener AND a dryer ball, but don’t skip the
fabric softener part. EDIT: Don’t skip the fabric softener the first time you prewash it! After that, it’s only necessary if that’s your preference. Fabric softeners can shorten the life of your fabric, so it’s up to you if you use it every time, but it really makes a difference in the initial wash. Thanks to Anon who pointed that out!
While your fabric is washing, let’s have our geometry lesson: shaped, faced hems like scalloped hems require two techniques: turning curved seams, and facing hems. They’re both simple and look nice.
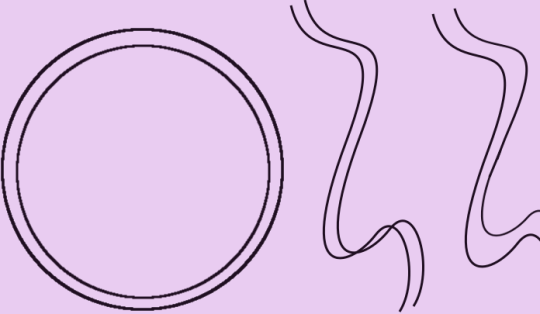
The only thing that makes scalloped hems tricky is that they require you to use curved seams. We’re going to have a 20dollarlolita geometry lesson for a second:
Part 1: The inside of a circle is smaller/shorter than the outside of a circle (image on the left). The outside of a circle is bigger/longer than the inside of the circle. This is really the only fundamental lesson here.
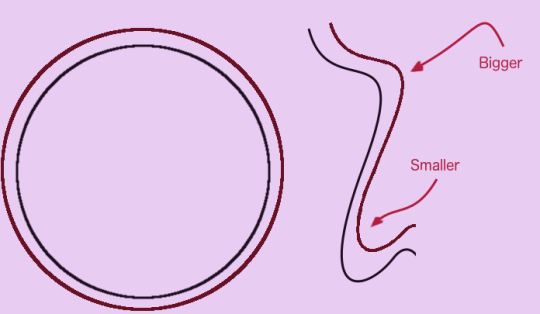
Part 2: When you draw your seam allowance on a curved seam, that seam allowance isn’t an exact copy of your stitching line. The curve in the middle shows what happens when your seam allowance tries to be an exact copy of the stitching line. The lines overlap or are different distances from each other, and you can’t sew a seam where your seam allowance overlaps your stitching line and stops existing. The image on the right is a better approximation of a realistic seam allowance. Just pretend that it doesn’t change thicknesses. Photoshop is hard sometimes.
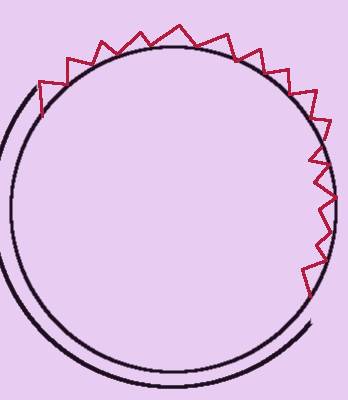
Part 3: When you have your pieces with the wrong sides together, they lie flat. However, when you’re sewing, you turn the piece inside-out and put the seam allowance on the inside. Here’s where your problem starts. The outside of a circle is bigger than the inside of a circle. When you turn our circle right-side-out, you make the outside of the circle become the inside of the circle. However, the actual amount of fabric that you have in your formerly outside circle doesn’t change. There’s too much fabric for it to lie flat, and it will become lumpy. We don’t like lumpy lolita hems.
a+ photoshop
To fix this, you have to remove some of the fabric in the outside circle. When you cut little notches out of the seam allowance, you can turn them into an inside circle that doesn’t have too much fabric in it.
Geometry lesson done! Sorry to be boring, but too many tutorials go “just cut this and it goes flat” without explaining why it smooths out, and that bothers me.
So,
step 1 is to look at your hem, and cut your hem facing:
Terminology: facing is fabric that you put in your garment, that shows with the
right side pointing at the inside. It’s often used to finish a hem or
cover a seam.
Face or facefabric is the fabric that will show on the
outside or the right side of the fabric.
Face of your fabric or fabric’s face is the side of the fabric you want pointing to the outside. In my case, it’s the side with the print. Technically speaking, whatever side you decide is the front is the face of your fabric, even if it’s not what the manufacturer intended. You are the master of your own destiny in this case. Double-faced is fabric that looks the same on both sides.
Interfacing is what you put
between the backside of the face, and the facing, for stability or reinforcement. Any
questions? Confused yet? Moving on!
To save on the confusion, I generally try to say say “facing,” “front fabric,” or “fashion fabric,” and “interfacing,” when I’m writing for this blog.
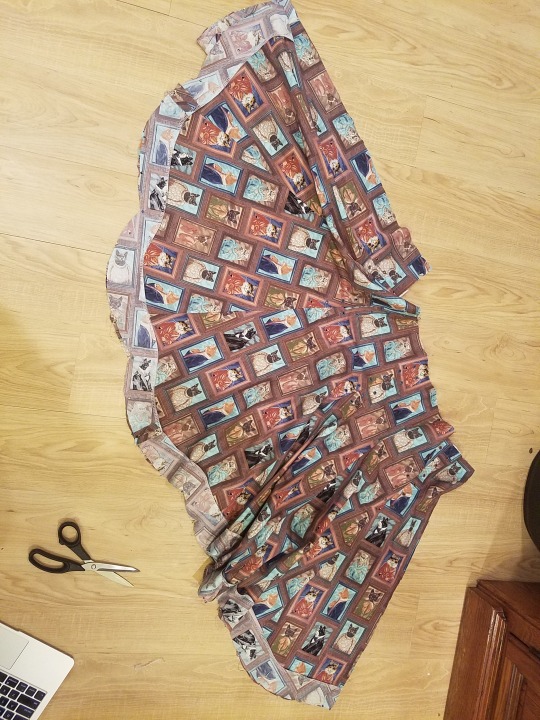
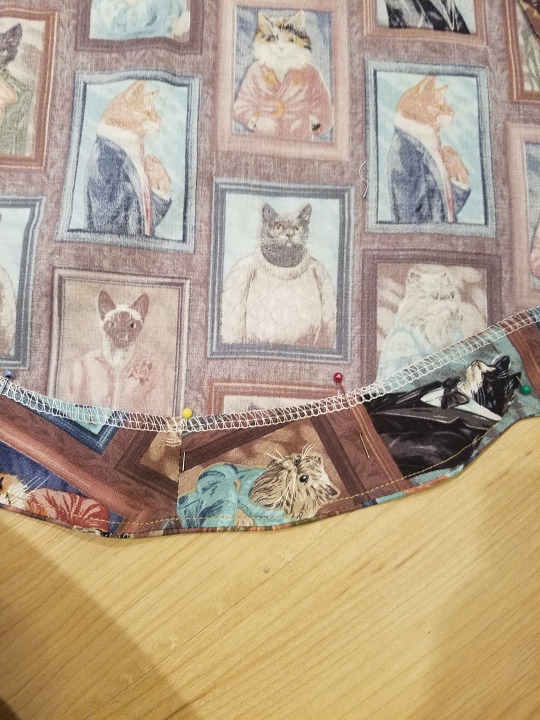
As you
can see, my hem facing is cut out of the same fabric as my skirt. You can also use a coordinating, but less expensive fabric. In this case, the cats on my facing are going sideways, because I ran out of fabric to make them go the proper direction.
The
hem of the skirt and the hem of the facing need to match exactly, and
the hem facing needs to be about three or four inches above the hem.
My hem facing’s other edge is shaped sort of like my hem, but it
would have been much easier to just make it a straight line above the
scallops.
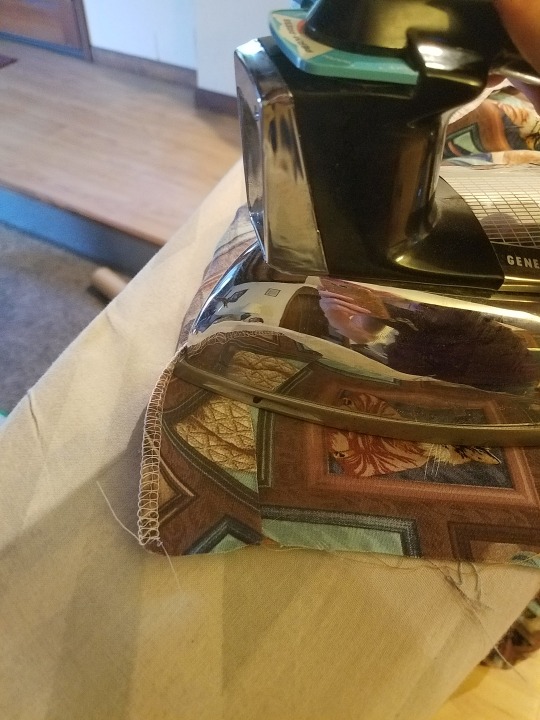
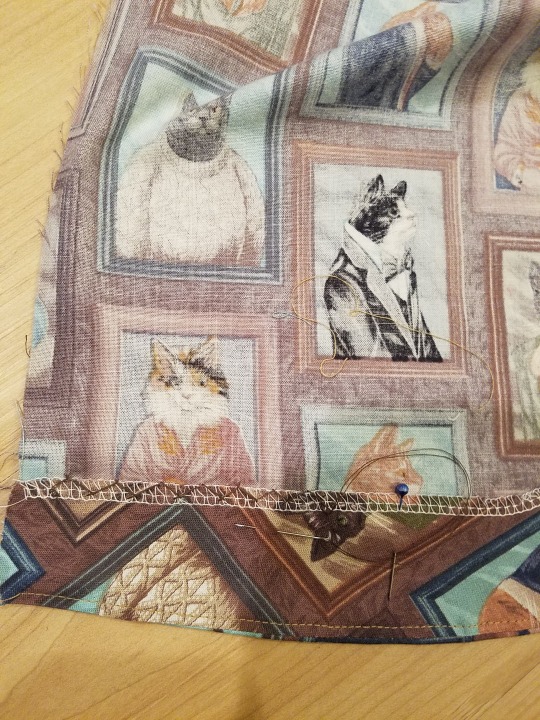
You’re
going to need to finish your non-hem edge. I used an overlock because
I have a serger. You can use a zigzag, or just press it down on the
wrong side about 5/8". You don’t need to double-press, because
the skirt will cover the raw edge when you’re done. This is why it saves you a lot of trouble to just cut the back edge of the facing in a straight line.
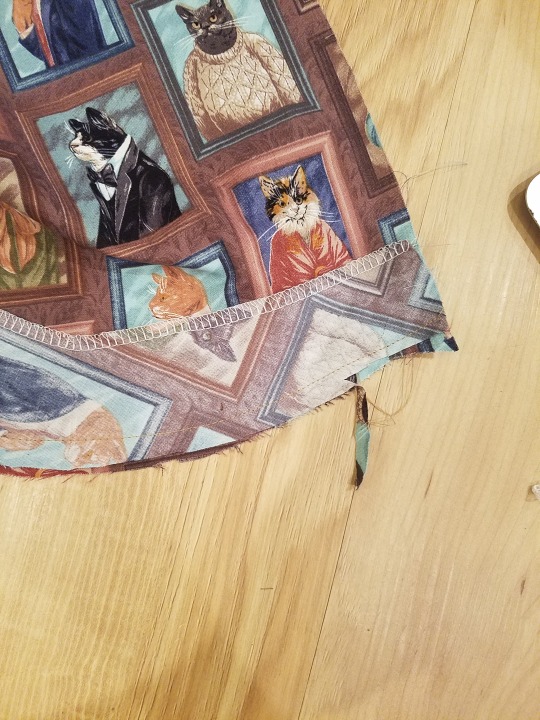
Step
2, sew the facing to the hem, just along the hem edge. If your hem
has any corners, like mine does at the edge of the scallops, make
sure your turns at the points are sharp. Whatever your hem allowance in your patterns
was (mine was 3/8"), sew that distance as your seam allowance.
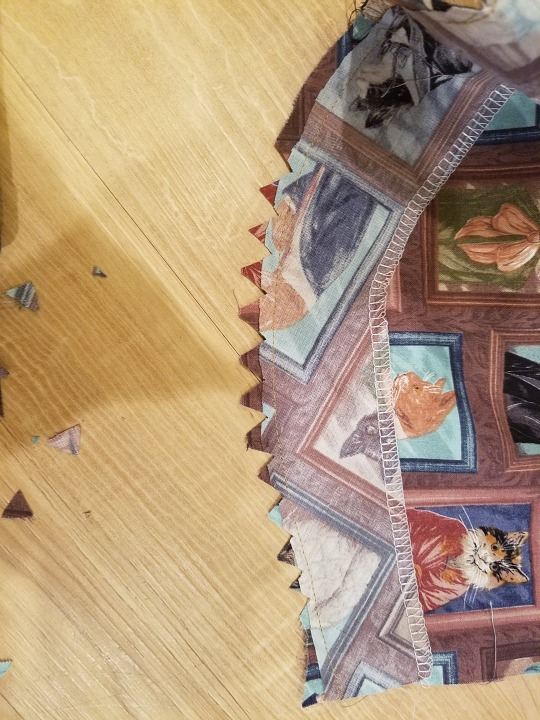
Step
3, grade your seam allowance. Grading is a really great precision
sewing technique. Here, it means cut off half of the seam allowance
on the facing side only.
The
purpose of grading is to prevent the seam allowances from showing a
bump. When you cut the edges of your seam allowance in layers, you
make the whole seam smoother from the outside. In general, you want
the seam allowance closest to the outside fabric to be the longest,
and the seam allowance on the inside to be the shortest. This is why
we cut the facing seam allowance shorter, not the outside fabric.
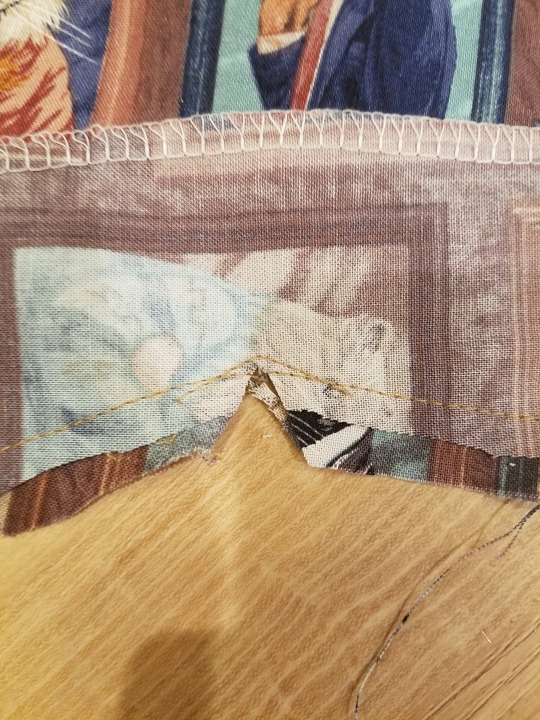
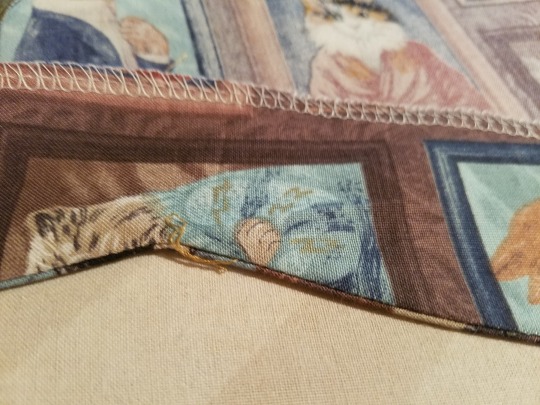
Step 4: If you’ve got inside corners at the edges of your scallop, notch them all the way up to your stitching line. Here, you can see that my original stitching line didn’t have a sharp enough point, so I sewed an extra line of stitching before I notched it.
If you skip this step, you won’t be able to fully turn the scallop to the front. You want to go all the way to the stitching line, but not through it!
Now, clip your seam allowances so you can turn them inside. Remember our geometry lesson up there.
The graded seam allowance is two different lengths, but you can clip them like they’re one piece.
Grading and then clipping saves you a lot of time, instead of doing it the other way.
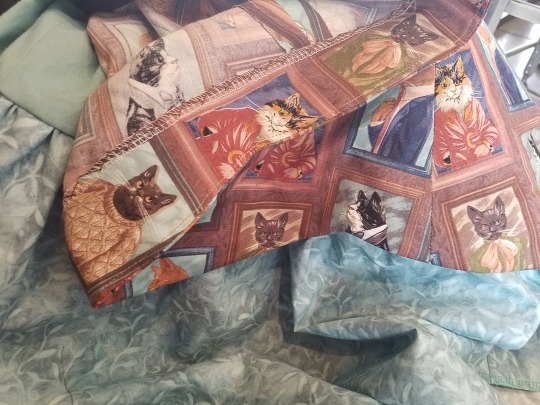
Step 5, press and turn. Start by pressing them from the right side, like this. Take some time to prevent any lip-like folds at the seam line. Use the very tip of your iron and work it into the fold to flatten it out.
Then flip over your facing to the wrong side and press it flat with your iron.
You want none of the facing to show on the right side, and a little tiny bit of the front fabric to show on the back.
If your facing doesn’t sit 100% flat at this point, troubleshoot it until it does. You don’t get a better chance to fix it than this.
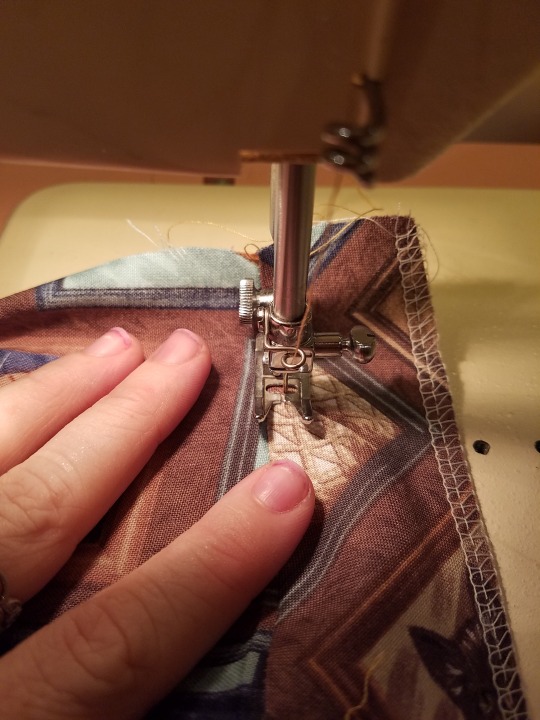
Step 6
is understitching, AKA the best secret trick ever. When you
understitch, you sew your seam allowances to your facing, about 1/8″ from your seam line. The purpose
of understitching is to keep your facing on the inside and your
outside on the outside. Right now, our facing is all hidden in the backside, and not showing at all on the front. With time, facings like to shift so that the
seam creeps forward, and makes the facing visible. It’s not a good look. Understitching
stops that, and it’s necessary for any garment you want to wash more
than once.
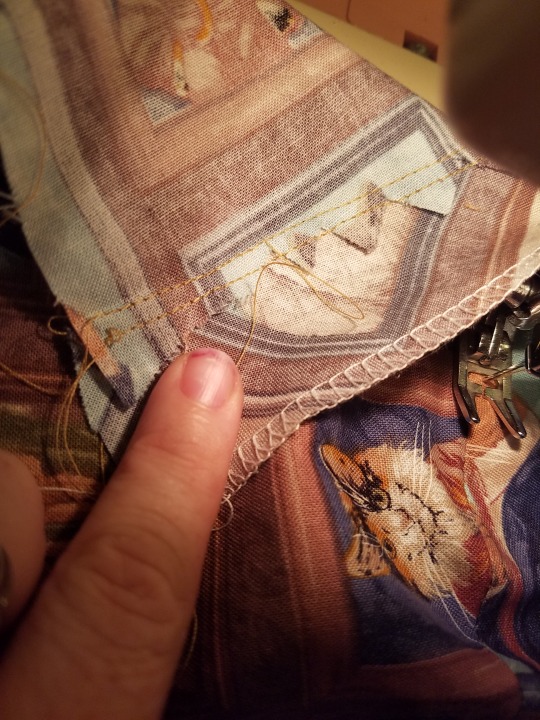
The
best way to understitch is from the outside, because you can really
see where you’re sewing line is going. You can’t actually see the seam allowances, but you don’t need to, because you can feel them through the fabric. On the left is my front side of my dress, and on the right is my facing. All of the seam allowances are pressed towards my facing. With my index finger, I can feel that there is no seam allowance on the left side. If I feel a little bump, I know to stop and move it to the right before I sew over it.
You really don’t want any stitching to touch your front fabric here, which is why you want to do this from the outsides.
When you flip it over to the wrong side, you can see your seam allowance sewn up all nice and neat. The top line of stitching is my seam. The bottom is the understitching.
Go slow, stop often, and keep one finger
monitoring your front fabric and feeling for any pieces of seam
allowance that might have gotten shifted to the improper side. The
facing side should feel chunky and the face fabric should feel thin
and smooth. And don’t worry, as long as your finger stays touching
the fabric, even lightly, you can’t sew over your finger because your
presser foot will stop you. It’s actually incredibly difficult to sew over your finger (despite what Project Runway tells you).
Step
7, press it again. Get it all arranged so it looks good, press it from the
back, and then the front. Get your facing smooth all the way to the other edge. You
want to get it so it looks perfect, because you’re about to fix it
like that forever. Pin the top edge of the facing so that it’s smooth
and not going anywhere.
You can see my little line of understitching here.
Step
8, using an invisible stitch of your choice, sew that facing down by
hand.
Doing 7 other steps of sewing and pinning and then still having to hem it by hand has always felt like the punch line to a joke I didn’t get to hear, but you’ve done so much work that you don’t want to wreck it with a line of machine stitching visible on the outside.
(unless your facing edge is perfectly even and straight, and you decide to hide that stitching line with some lace, but that’s Technically Not The Right Way To Do These Things)
I use the flat catchstitch/cross hem stitch, because I’m really fast at it and it’s very easy to regulate my thread tension. Any stitch that looks invisible from the outside will work. You can use a blind machine hem, if you’re confident in your machine’s ability to do it (but I’m not confident in mine).
If you need a refresher on the flat catchstitch and/or want to go down 20dollarlolita memory lane back to 2014, here’s a post on hemming stitches.
And there you go! Shaped hems are a great way to add detail and interest to an otherwise plain dress or skirt, without having to buy 5 yards of lace. You can stick a ruffle behind it for some extra cuteness.
You can use this faced hem technique on any hem you want, no matter what shape.
WHEN AND HOW DID THIS GET 300 NOTES
HOLY CROW, THANK YOU!